Homemade Baby Food Recipe Step by Step
Making baby food at home can be simple, safe, and rewarding when you follow a clear process. You do not need fancy ingredients or complicated recipes. Start with soft, age-appropriate foods, prepare them safely, and adjust the texture as your baby grows.
This guide walks you through homemade baby food step by step, including first-food ideas, simple recipes, storage rules, choking precautions, and age-by-age textures. Use it as general education, and talk with your baby’s pediatrician if your baby was born premature, has feeding difficulties, has eczema or known allergies, or you have any concerns about starting solids.
Quick Answer
Homemade baby food starts with one soft, age-appropriate ingredient: wash it, cook it until tender when needed, blend or mash it, thin with breast milk, formula, or water, then serve a small fresh portion. Start around 6 months when your baby shows readiness signs, and always follow choking, allergy, and storage safety rules.
Key Takeaways
- Most babies are ready for solids around 6 months, but readiness signs matter more than the calendar.
- Start with soft single-ingredient foods, then build toward thicker textures, combinations, and finger foods.
- Breast milk or formula remains the main source of nutrition when solids begin.
- Avoid honey before 12 months, added sugar, high-sodium foods, unpasteurized foods, and choking hazards.
- Store homemade baby food in the refrigerator for 1 to 2 days or in the freezer for 1 to 2 months.
At a Glance
| Time Required | 10 to 25 minutes per small batch |
| Difficulty | Easy |
| Tools Needed | Knife, cutting board, steamer or pot, blender or fork, clean containers |
| Cost | Low; usually less than buying single-serve jars or pouches |
Warning: This article is for general education and is not a substitute for medical advice. Ask your baby’s doctor before starting solids if your baby has severe eczema, an egg allergy, poor weight gain, swallowing trouble, developmental delays, or a history of allergic reactions.
Benefits Of Homemade Baby Food
Making your baby’s food at home gives you control over the ingredients, texture, and portion size. It can also help your baby explore the same wholesome foods your family eats, prepared in a baby-safe way.
Recommended Products

Make fresh, delicious food with wholesome ingredients. You control exactly what goes in - no hidden stabilizers, preservatives, or flavor enhancers necessary.

The nutribullet Baby Turbo Steamer is fast, easy to clean, and a real go-getter just like you. Not only does it steam cook fresh ingredients for homemade baby food, it also defrosts frozen foods and sterilizes baby bottles, pacifiers, utensils, and toys for easier baby times, all around.

Cook and blend fresh baby food all in one simple machine. The nutribullet Baby Steam + Blend combines the functionality of a cooking pot, steaming basket, and blender into one compact system, cutting down on mess, dishes, and oh-so-precious time.
Why Homemade Baby Food Can Be A Healthy Choice
Homemade baby food lets you choose simple ingredients such as fruits, vegetables, grains, beans, lentils, meat, poultry, fish, eggs, and plain yogurt. You can avoid added sugar, limit sodium, and skip ingredients your baby is not ready for yet.
This does not mean all store-bought baby food is bad. Many store-bought options are convenient and safe. The key is to read labels and choose foods with no added sugar and little or no sodium. Homemade food simply gives you more control.
Cost Savings That Add Up
Baby food jars and pouches can become expensive over time. A single sweet potato, banana, apple, or bag of frozen peas can make several small servings. You can also use plain family ingredients before seasoning them for adults.
For example, if you are steaming carrots for dinner, set aside a few soft pieces before adding salt, butter, or spices. Blend or mash those pieces for your baby’s meal.
Customizing For Your Baby’s Needs
Every baby develops at a different pace. Some babies need very smooth purees at first. Others quickly move toward thicker mashed foods. Homemade baby food makes it easy to adjust the texture.
You can start with one ingredient, watch how your baby responds, and slowly combine foods after your baby has tolerated them.
Building A Stronger Bond
Feeding your baby is not only about nutrition. It is also a chance to learn your baby’s cues. Watch for signs of interest, fullness, dislike, and tiredness. If your baby turns away, closes their mouth, cries, or pushes food out, pause and try again another day.
Less Packaging Waste
Making baby food at home can reduce the number of single-use jars, lids, and pouches your family uses. Reusable glass containers, stainless steel containers, or silicone freezer trays can make batch prep easier.

Credit: www.youtube.com
Before You Start: Is Your Baby Ready For Solids?
The CDC and the American Academy of Pediatrics explain that most babies begin solids around 6 months, but readiness signs are important.
Common Readiness Signs
- Your baby can hold their head steady.
- Your baby can sit in a high chair or supported seat with good control.
- Your baby opens their mouth when food comes near.
- Your baby watches you eat, reaches for food, or seems interested in mealtime.
- Your baby can move food from the spoon toward the back of the mouth and swallow.
Note: Breast milk or infant formula remains your baby’s main nutrition source when solids begin. Early meals are about learning taste, texture, and swallowing.
Foods And Drinks To Avoid Or Limit
For babies and young children, the CDC recommends avoiding or limiting certain foods and drinks:
- Honey before 12 months: Honey can cause infant botulism.
- Cow’s milk as a drink before 12 months: Breast milk or formula should remain the main drink. Plain whole cow’s milk can begin after 12 months unless your pediatrician says otherwise.
- Added sugar: Avoid sweetened yogurt, desserts, juice drinks, and sweetened snacks.
- High-sodium foods: Avoid processed meats, salty snacks, many canned foods, and adult packaged meals.
- Unpasteurized foods or drinks: Avoid raw milk, unpasteurized juices, and unpasteurized cheeses.
- High-mercury fish: Avoid shark, swordfish, king mackerel, bigeye tuna, marlin, orange roughy, and tilefish from the Gulf of Mexico.
- Juice before 12 months: Offer whole fruit instead of juice.
Choking Safety Comes First
Babies and toddlers can choke on foods that are hard, round, sticky, slippery, or cut into unsafe shapes. The CDC choking guidance recommends preparing food in safe sizes and textures.
- Have your baby sit upright while eating.
- Stay close and watch your baby the whole time.
- Serve foods soft enough to mash between your fingers.
- Cut soft finger foods into small, manageable pieces.
- Avoid whole grapes, whole berries, hot dog rounds, popcorn, nuts, seeds, chunks of meat, hard raw apple, raw carrot, large cheese cubes, and spoonfuls of nut butter.
Warning: Never give a baby thick spoonfuls of peanut butter or other nut butter. If introducing nut butter, thin a small amount with warm water, breast milk, formula, or puree until smooth and easy to swallow.
What About Common Allergens?
Common allergens include egg, peanut, tree nuts, milk, wheat, soy, fish, shellfish, and sesame. Once your baby is ready for solids, current guidance does not support delaying baby-safe forms of allergenic foods for most babies.
Start with a tiny amount of one allergenic food at home when your baby is well, then watch for symptoms such as hives, vomiting, swelling, coughing, wheezing, or trouble breathing. Call emergency services right away if your baby has trouble breathing, swelling of the lips or tongue, repeated vomiting, or seems limp.
If your baby has severe eczema, an egg allergy, or a previous reaction, ask your pediatrician before introducing peanut or other high-risk allergens.
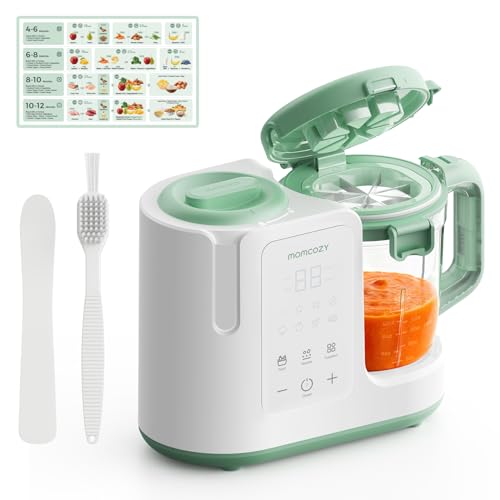
Essential Tools And Ingredients
You do not need a special baby-food machine. A few basic kitchen tools are enough for most recipes.
Recommended Products

Quality Design: This baby food processor is made from premium food-grade glass bowls, 8 stainless steel blades, and BPA-free food-grade plastic (PP). Baby Food Puree Maker Make Fresh and Nutritious Meals for Your Little One, It guarantees that every meal is clean and healthy for your baby. Pay attention: please remove the blade covers before use.

【High-Efficiency Food Processing】Equipped with a high-speed smashing motor, this baby food maker can chop fresh fruits, vegetables, meat, and more into nutrient-rich purees in just 8 seconds. Its 6-layer 8-blade design ensures ultra-fine textures for easy digestion and absorption by your baby's delicate stomach. For harder ingredients like potatoes or carrots, we recommend steaming them first and adding a small amount of water to achieve smoother results.

𝐒𝐚𝐯𝐞 𝐁𝐢𝐠, 𝐁𝐥𝐞𝐧𝐝 𝐖𝐞𝐥𝐥:This HEYVALUE Baby Gift Set comes with six baby food containers, a freezer tray, two silicone spoons, one silicone spatula, and baby food recipes, eliminating the need to buy them separately. It's a must-have for newborns!
Essential Tools You’ll Need
- Blender or food processor: Helpful for smooth purees.
- Fork or potato masher: Perfect for banana, avocado, sweet potato, and other soft foods.
- Steamer basket or small pot: Steaming keeps foods soft without waterlogging them.
- Knife and cutting board: Use clean tools and separate raw meat from produce.
- Fine mesh strainer: Useful for removing skins, seeds, or fibers from some foods.
- Small bowls and baby spoons: Portion food before serving so the storage container stays clean.
- Storage containers: Use clean airtight containers, glass jars, stainless steel containers, or silicone freezer trays.
- Appliance thermometer: Helps confirm the refrigerator stays at 40°F or below and the freezer at 0°F or below.
Ingredients To Stock Up On
Start simple. Choose fresh or frozen unsweetened foods with no added salt, sugar, sauces, or seasonings.
| Category | Examples | Beginner Tip |
|---|---|---|
| Fruits | Bananas, apples, pears, peaches, avocado | Use ripe fruit. Cook firm fruits until soft. |
| Vegetables | Carrots, sweet potatoes, peas, squash, spinach | Steam or roast until very tender, then blend or mash. |
| Grains | Oats, barley, quinoa, iron-fortified infant cereal | Offer a variety of grains instead of relying only on rice cereal. |
| Proteins | Chicken, turkey, beef, lentils, beans, eggs, fish | Cook fully and blend with liquid until soft and smooth. |
| Dairy | Plain whole-milk yogurt, pasteurized cheese | Choose unsweetened options and serve in baby-safe textures. |
Pro Tips For Beginners
- Wash your hands before preparing or feeding food.
- Wash produce well before peeling or cutting.
- Cook meat, poultry, fish, and eggs fully.
- Do not add salt, sugar, honey, or sweeteners.
- Use breast milk, formula, or water to thin purees.
- Put a small serving in a separate dish before feeding.
- Throw away food left in the serving dish after the meal.
Pro Tip: Before seasoning family food, set aside a plain cooked portion for your baby. This saves time and helps your baby get used to family flavors safely.
How To Make Baby Food Step By Step
Use this basic method for most fruits, vegetables, grains, and proteins.
Recommended Products

Effortless Meal Preparation: Streamline your baby's nutrition with our 3 Pack Silicone Freezer Tray. Batch prepare baby food, purees, breastmilk, and more for efficient and convenient meal planning.

12-Pack, Durable 4oz Glass Jars with Lids – KeaBabies Baby Food Jars Glass check all the right boxes for a reliable baby snack containers. Ideal for busy parents as baby food containers for prepping and storing homemade meals smoothly.

Premium Baby Food Storage Containers: The set has 8 food storage containers, 4 oz each. 8 colors, 1 of each color. There are many colors for easy differentiation of use and a large number to meet the daily needs of baby use. A pen can be used to write the name, date or other information on the lid to remind you what is inside the jar. Perfect for storing homemade baby food, solid baby food, fruit and vegetable purees, jams, etc
Step 1: Choose One Baby-Safe Ingredient
For the first few foods, choose one ingredient at a time. Good beginner options include banana, avocado, sweet potato, carrot, pear, oatmeal, peas, lentils, or iron-fortified infant cereal.
Step 2: Wash, Peel, And Chop
Wash produce under running water. Peel tough skins when needed. Cut food into small pieces so it cooks evenly. Keep raw meat and poultry away from ready-to-eat foods.
Step 3: Cook Until Very Soft
Steam, simmer, bake, or roast firm foods until they are soft enough to mash easily. Bananas and ripe avocados do not need cooking. Meat, poultry, fish, eggs, beans, lentils, and grains should be fully cooked.
Step 4: Blend, Mash, Or Puree
For early purees, blend until smooth. For older babies, mash with a fork and leave a little texture. Add breast milk, formula, cooking water, or plain water a spoonful at a time until the texture is right.
Step 5: Check The Texture
The food should be smooth and thin for beginners. As your baby grows, gradually make it thicker and lumpier. For finger foods, pieces should be soft and small enough to reduce choking risk.
Step 6: Serve A Small Portion
Start with half a spoonful to 1 or 2 teaspoons. Let your baby set the pace. Some babies need several tries before accepting a new food.
Step 7: Cool And Store Safely
Cool cooked food quickly, portion it into clean containers, and refrigerate or freeze it within 2 hours. Label each container with the food name and preparation date.
Age-appropriate Food Options
Your baby’s texture needs change quickly. Move gradually from thin purees to mashed foods, soft lumps, and safe finger foods.
6 To 8 Months: Smooth Purees And Single Ingredients
At this stage, start with smooth, soft foods. Offer one single-ingredient food at a time at first, and wait 3 to 5 days before trying another new food. This makes it easier to notice possible reactions.
Good first foods include:
- Mashed banana
- Avocado puree
- Steamed carrot puree
- Sweet potato puree
- Pea puree
- Iron-fortified infant oatmeal
- Pureed lentils
- Pureed chicken or turkey mixed with liquid
9 To 12 Months: Textured Foods And Simple Combinations
As your baby gets better at moving food around the mouth, offer thicker mashed foods and soft combinations. Mild gagging can happen as babies learn texture, but choking is silent or may involve trouble breathing, blue lips, or inability to cry or cough. Stay close and watch carefully.
Try simple combinations such as:
- Mashed peas and carrots
- Oatmeal with pear puree
- Sweet potato with lentils
- Rice with finely shredded chicken
- Avocado with soft cooked egg
- Plain yogurt with mashed peach
12+ Months: Finger Foods And Family Meals
After the first birthday, many babies can eat more of the same healthy foods the family eats, as long as they are soft, low in sodium, and cut safely. Continue avoiding choking hazards.
Good options include:
- Small pieces of soft cooked pasta
- Diced soft fruit
- Scrambled egg pieces
- Well-cooked beans, gently mashed
- Soft cooked vegetables
- Small flakes of cooked low-mercury fish
- Tender shredded chicken
How To Stay Flexible And Observant
Babies change their preferences often. One day your baby may love carrots, and the next day they may refuse them. Keep offering a variety of foods without pressure. If your baby turns away or closes their mouth, stop and try again later.
Credit: babyfoode.com
Simple Recipes For Beginners
These recipes are easy, mild, and beginner-friendly. Always cool cooked food before serving, and check for lumps or hard pieces.
1. Simple Mashed Banana
Bananas are soft, naturally sweet, and easy to prepare.
- Peel a ripe banana.
- Place half of it in a clean bowl.
- Mash with a fork until smooth.
- Add breast milk, formula, or water if you want a thinner texture.
Serve right away. Discard any leftovers from the serving bowl.
2. Steamed Carrot Puree
Carrots have a mild sweet flavor and blend well.
- Peel and chop two carrots into small pieces.
- Steam until very soft, about 10 to 15 minutes.
- Blend with a small amount of water, breast milk, or formula.
- Keep blending until the puree is smooth.
Let it cool before serving.
3. Creamy Avocado Mash
Avocado is a no-cook option with a creamy texture.
- Cut a ripe avocado in half.
- Remove the pit.
- Scoop the flesh into a bowl.
- Mash until smooth.
- Thin with breast milk or formula if needed.
Serve fresh. Avocado browns quickly, so it is best made in small portions.
4. Apple Puree
Cooked apple puree is gentle and naturally sweet.
- Peel and chop one apple.
- Steam or simmer until soft.
- Blend into a smooth puree.
- Add a little cooking water, breast milk, or formula to adjust thickness.
Cool before serving.
5. Sweet Potato Puree
Sweet potato is soft, filling, and easy to batch prep.
- Wash, peel, and dice one small sweet potato.
- Steam, boil, or bake until tender.
- Blend or mash until smooth.
- Add liquid a spoonful at a time until it reaches the right texture.
Portion extra puree into clean containers for safe storage.
6. Lentil And Carrot Puree
Lentils add plant-based protein, iron, and fiber.
- Rinse 2 tablespoons of red lentils.
- Cook with chopped carrot in water until both are very soft.
- Blend with a little cooking liquid until smooth.
- Cool before serving.
7. Chicken And Squash Puree
This is a good savory option once your baby has tolerated single foods.
- Cook plain chicken fully until tender.
- Steam or roast peeled squash until soft.
- Blend chicken and squash together with water, breast milk, formula, or low-sodium cooking liquid.
- Blend until no stringy pieces remain.
8. Baby Oatmeal With Pear
This mild recipe works well for breakfast.
- Prepare iron-fortified infant oatmeal or finely ground oats according to package directions.
- Steam peeled pear until soft.
- Mash or blend the pear.
- Stir the pear into the oatmeal and cool before serving.
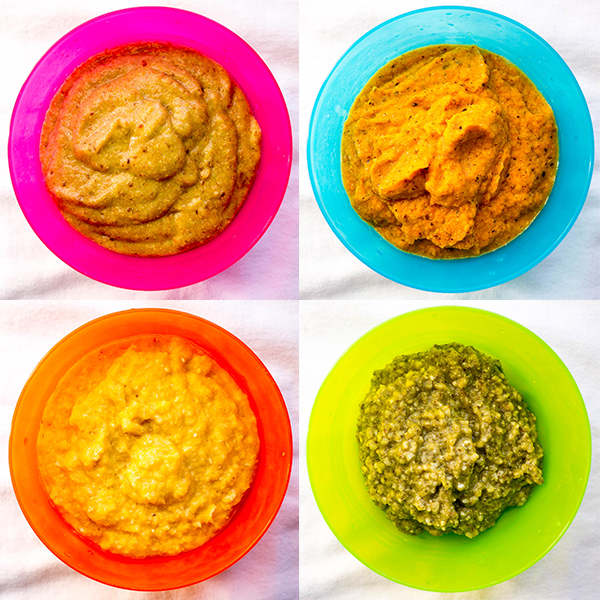
Creative Flavor Combinations
Once your baby has tried individual foods without a reaction, you can combine familiar ingredients. Keep the texture baby-safe and skip salt, sugar, honey, and spicy heat.
-
Apple and Sweet Potato
Steam peeled apple and sweet potato chunks until tender. Blend with a splash of water, breast milk, or formula. The result is creamy, naturally sweet, and easy to swallow.
-
Spinach and Pear
Steam fresh spinach leaves with peeled pear slices until softened. Blend until smooth. This mix adds greens while keeping the flavor mild.
-
Banana and Avocado
Mash half a ripe banana with half a ripe avocado. This no-cook combination is creamy and quick for busy days.
-
Carrot and Apple
Steam chopped carrot and peeled apple until very soft. Blend until smooth. This gives a bright flavor without using juice or added sugar.
-
Pumpkin and Cinnamon
Steam or roast pumpkin until soft, then blend with a tiny pinch of cinnamon and a little liquid. Use a small amount of cinnamon only, and avoid spice blends that contain sugar or salt.
Note: Citrus juice, salt, sugar, and honey are not needed for baby food. Whole fruits and naturally sweet vegetables add plenty of flavor.
Credit: www.kitschencat.com
Storage And Safety Tips
Safe storage is just as important as the recipe. Babies are more vulnerable to foodborne illness, so keep portions small and storage times short.
Store Baby Food In Airtight Containers
Use clean containers with tight-fitting lids. Label each container with the food name and preparation date. Small portions are best because you can thaw only what you need.
Refrigerate Within Two Hours
Do not leave baby food solids or liquids at room temperature for more than 2 hours. Put freshly made food in the refrigerator or freezer promptly. Keep the refrigerator at 40°F or below and the freezer at 0°F or below.
Use This Storage Chart
| Food Type | Refrigerator | Freezer |
|---|---|---|
| Homemade baby food | 1 to 2 days | 1 to 2 months |
| Fruit or vegetable puree served fresh | Use within the safe homemade food window | Freeze in small portions for best quality |
| Purees with meat, poultry, egg, fish, beans, or lentils | Use quickly, ideally within 1 day | Use within 1 to 2 months |
Freeze For Longer Storage
Spoon puree into a clean silicone freezer tray or small freezer-safe containers. Once frozen, move cubes to a freezer-safe bag or container. Label with the food name and date.
Thaw Safely
Thaw frozen baby food in the refrigerator, under cold running water in a sealed container, or by heating it directly before serving. Do not thaw baby food on the counter.
Reheat Carefully
Warm food until hot, stir well to remove hot spots, and let it cool before feeding. Test the temperature before offering it to your baby. Never serve food that feels hot.
Discard Leftovers
If a spoon has touched your baby’s mouth and then the food, discard any food left in that serving dish. Saliva can introduce bacteria. To reduce waste, serve a small amount first and add more from the clean container if needed.
Clean Containers Thoroughly
Wash containers, lids, trays, blender parts, and utensils with hot soapy water. Rinse well and let them dry completely before reuse.
Check For Signs Of Spoilage
Throw away baby food that smells off, changes color unexpectedly, has mold, has been stored too long, or was left out too long. When in doubt, throw it out.
Troubleshooting Common Baby Food Problems
The Puree Is Too Thick
Add breast milk, formula, plain water, or cooking water one teaspoon at a time. Blend again until smooth.
The Puree Is Too Thin
Add mashed banana, avocado, sweet potato, cooked oatmeal, or another thick soft food your baby has already tolerated.
My Baby Refuses The Food
Do not force it. Try again another day. Babies may need repeated gentle exposure before accepting a new flavor.
My Baby Gags On Texture
Gagging can be part of learning, but it should improve with practice. Go back to a smoother texture for a short time, then slowly thicken it again. If your baby has repeated gagging, coughing, choking, or trouble swallowing, talk with your pediatrician.
The Food Tastes Bland
Baby food does not need salt or sugar. Try flavor from safe ingredients such as cinnamon, mashed fruit, roasted vegetables, or mild herbs after your baby has tolerated basic foods.
Frequently Asked Questions
What is the best way to make baby food?
The best way is to start with one soft ingredient, cook it until tender if needed, blend or mash it, thin it with breast milk, formula, or water, and serve a small fresh portion. Keep the texture smooth for beginners and thicker as your baby grows.
When can I introduce homemade baby food?
Most babies can begin solids around 6 months when they show readiness signs, such as good head control, sitting with support, and opening their mouth for food. Ask your pediatrician if you are unsure.
How do I store homemade baby food safely?
Store homemade baby food in clean airtight containers. Refrigerate within 2 hours and use within 1 to 2 days, or freeze for 1 to 2 months. Discard food left in your baby’s serving dish.
Can I use frozen fruits and vegetables for baby food?
Yes. Choose plain frozen fruits or vegetables with no added sugar, salt, sauces, or seasonings. Cook firm fruits and vegetables until soft, then blend or mash to the right texture.
Can I add salt, sugar, or honey to baby food?
No. Babies do not need added salt or sugar, and honey should never be given before 12 months because of the risk of infant botulism.
What baby food should I try first?
Good first foods include mashed banana, avocado, sweet potato, carrot puree, pea puree, iron-fortified infant oatmeal, lentils, and pureed meats. There is no single perfect first food, but iron-rich options are helpful.
Conclusion
Homemade baby food does not have to be complicated. Start with one soft ingredient, prepare it safely, and adjust the texture as your baby grows. Keep portions small, watch your baby’s cues, and build variety slowly.
The most important steps are simple: start when your baby is ready, avoid choking hazards, skip honey before 12 months, limit added sugar and sodium, introduce new foods thoughtfully, and store leftovers safely. With a little planning, you can make fresh, nourishing meals that support your baby’s growth and help mealtime feel calmer.
Sources
- CDC: When, What, and How to Introduce Solid Foods — supports timing, first foods, single-ingredient introduction, and allergen guidance.
- HealthyChildren.org from the American Academy of Pediatrics: Starting Solid Foods — supports readiness signs, feeding approach, iron-rich foods, and allergen cautions.
- CDC: Foods and Drinks to Avoid or Limit — supports guidance on honey, added sugar, sodium, cow’s milk before 12 months, juice, unpasteurized foods, and high-mercury fish.
- CDC: Choking Hazards — supports choking prevention and unsafe food shapes/textures.
- FDA: Once Baby Arrives Food Safety — supports the 2-hour room-temperature rule and discarding served leftovers.
- FoodSafety.gov: Safe Storage of Puréed and Solid Baby Food — supports refrigerator and freezer storage times for homemade baby foods.